How to create a listing from scratch
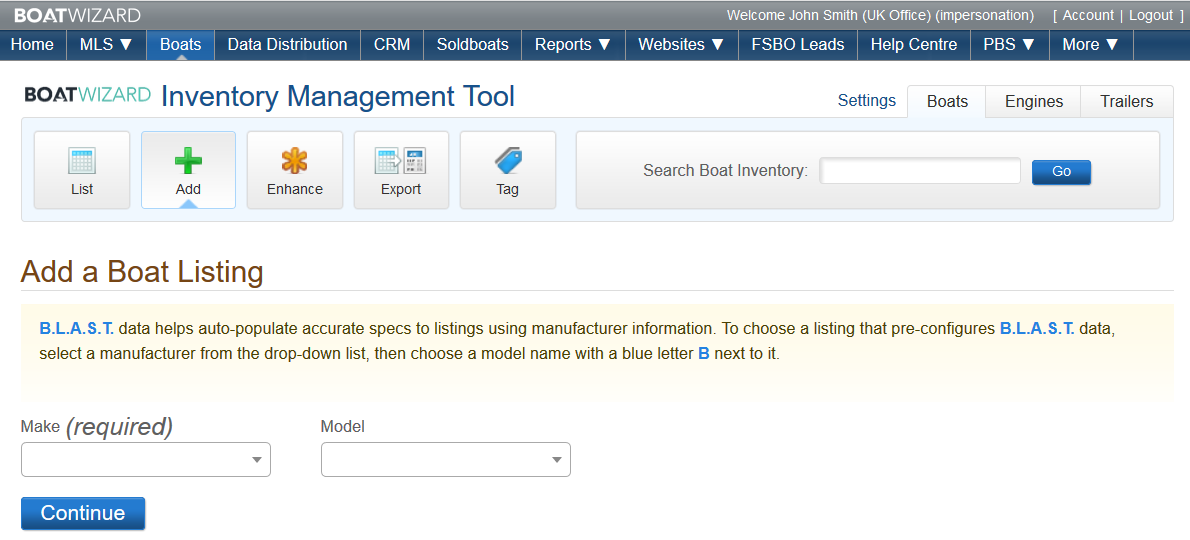
Step 1. Click on the Boats tab at the top of the BoatWizard menu.

Step 2. Click on the Add button and the Add a Boat Listing page will appear.

Step 3. Enter the Make of the boat in the field provided. As you begin typing, a Make list will be displayed in the drop-down. Select the Make of your boat from the populated list, then enter the model of the boat in the field provided. As before, a list of models will appear as you type; select the model that matches your listing.
Click Continue to search for matching listings. If no matching specifications were found, you will have the option to create a standard listing from scratch. To get started, click Create Listing from Scratch or click the Make and Model if your boat appears.
Step 4. Next you will see the Basic Details page. First, notice the menu on the left side of the page. Use this menu to navigate through the listing creation process in any order that you choose. Or, preview your listing at any time by clicking the Preview Listing button. To save your listing, click Save at the bottom of the page. To move to the next page, click Continue (your listing will be saved). If you are done with the listing, click Finish to activate your listing. Or, if you do not wish to complete the listing creation process, click on the link, Cancel Changes to this Page.

Step 5. The first step in the listing creation process is to complete the Basic Details. The fields on each page with a red asterisk must be completed before the boat can be made Active. We recommend you enter as much detail as possible as listings with more details tend to generate more leads.
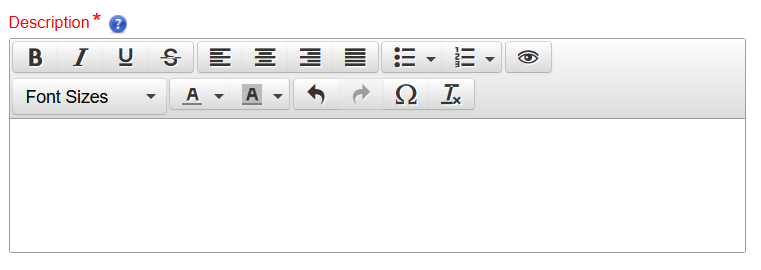
The Description field on the Basic Details page now features a user-friendly text editor tool bar, so HTML is no longer required. From the tool bar, you can paste formatted text from Word, HTML, PDF or other external applications while maintaining most of its source formatting. Spell check can also be performed from this toolbar. It is important you use this space for the key selling points of the vessel. More specific information can be added in the Descriptions and Features tabs.
The Additional Contact Information is located at the bottom of the Basic Details page within the Sales Contact Information. The same text editor tool bar is available here and can be used to enhance text, add links, and insert images. Here you can assign an office and broker to the listing. All offices and brokers have to be active on your account and will show in a dropdown menu.

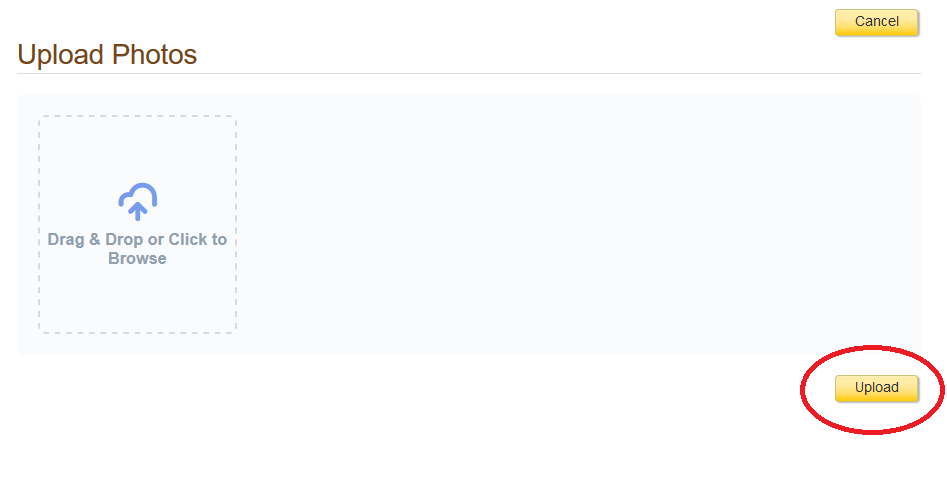
Step 6. Upload photos. The process to add photos has been improved to make loading images faster and easier.
The BoatWizard photo uploader is designed to make it even easier and more convenient for you to upload your boat photos. The uploader supports large, high quality photos to go with your listings. To add a new photo, click “Add Photo” which will open a pop up window. Next, drag and drop or click to add the selected photos you require from the folders on your computer and when they populate click Upload. You can add unlimited photos.
You can view and modify your photos in two different views – Grid view, and List view. Click and drag the thumbnails to reorder or tick the check box to delete photos as required. To edit the title of your photos, go to the List view and insert your text. To save all changes click “Save” at the top or bottom of the page.

To add a video you will need to have purchased Video Suite. Please contact your Account Manager today if you are interested in this product or if already purchased then see the link at the end of this article on how to add a video to your listing.
Step 7. To add descriptions to your listings, select Descriptions from the left menu. Select from the default titles provided or choose to Add Blank Description to add a description field with a blank title which you can amend. Each descriptive text box has its own permissions control. You can edit the text in these descriptions, and reorder them by clicking and dragging the appropriate title. Then click Save.

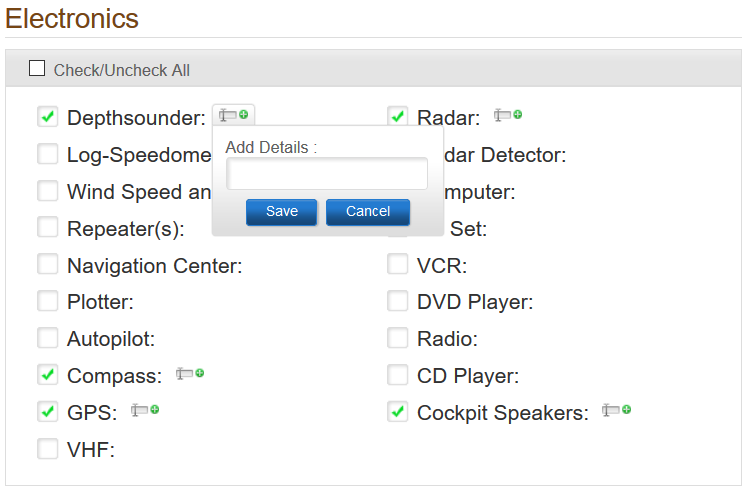
Step 8. To add features to your listings, select Features from the left menu. You will see a section for each feature area of the listing: electronics, inside equipment, electrical equipment, outside equipment/extras, covers and additional equipment. After selecting a feature, a text field will appear next to the feature(s) selected. You can then enter specific manufacturer information (or quantity) for that feature. Features will only appear on listings when the check box has been selected.
To add measurements to your listings, select Measurements from the left menu. You will see a section for each measurement area of the listing: speed & distance, dimensions, weight, miscellaneous, tanks and accommodations. As a reminder, there are a few fields on this page that are required to make the listing On-Active. To save your changes and to continue working on your listing, click Continue.
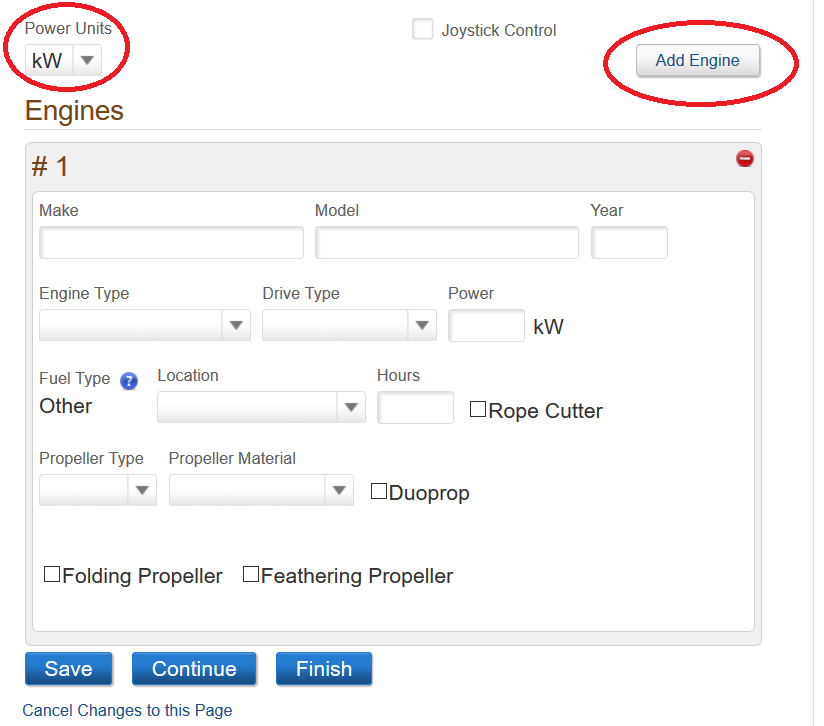
To add propulsion to your listings, select Propulsion from the left menu. Complete the desired fields for engine specs and details. To add another Engine then click Add Engine. You can select the power units on the left for each engine. To save your changes and to add additional information, click Continue.
Step 9. In the Other details section you can add the hull shape, hull warranty, designer, builder but all of this information is optional and not required. You can also add any links at the bottom to a manufacturer website, a brochure or any other additional media.

Step 10. To see a preview of your listing at any time during the listing creation process, click on Preview Listing on the left menu. The listing preview displays the data currently on the listing, including photos, basic details and descriptions. After previewing the listing, you can Save or Activate your listing from the preview page.
Step 11. To activate your listing click Finish. You can then select if you offer a Live Video Tour or Local Delivery Available. An icon will be displayed on the listing if you check these boxes.
Live Video Tour: if your business can provide an on-location video tour of this boat. You will receive appointment requests from prospects interested in this option.
Local delivery Available: if you offer local delivery for this boat.

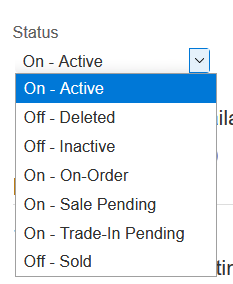
Step 12. Then select from the dropdown the status of your boat and click Update. If you want it to be live straight away then select On-Active
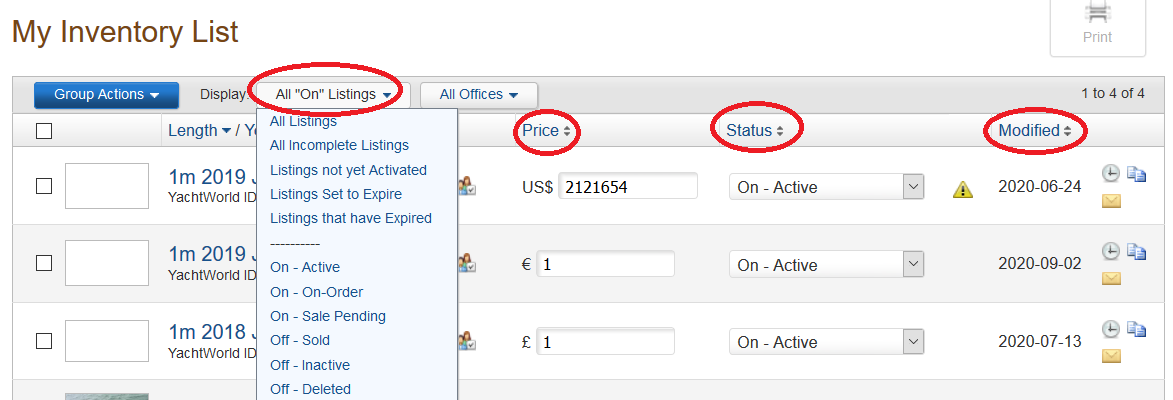
Your boat will then appear every time you click the blue tab Boats/Inventory along with any other active boats you enter. You can then use the dropdown menu to display all listings or any inactive, sold or deleted boats.
You can also sort your boats list by clicking the arrow next to the column headings to sort them by length, year, make, model, price, status and date modified.
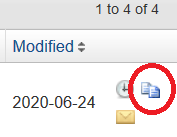
TIP: Copying a boat
If you have more than one boat with the same make and model you can copy a listing. This will save you a bit of time as it will copy all the information from the original listing apart from the price and boat location.
To copy a listing please click the 2 pages symbol on the right next to the boat you would like to copy
Next make sure you enter a price and the boat location as these will be blank and are required before you can make the listing active.
Next check through each page making sure the information is correct and then click Finish, choose a status and then click Update.
This copied boat will then display in your boat list.